Diana draped top: Sewing Instructions
Step 1: Finish the back neckline
- Cut a strip of main fabric the length of your back neckline, and around 3 cm wide.
- Press a fold into this strip, 1 cm from the edge.
For woven fabric make this a bias cut strip.
For knit fabric make a strip with the stretch of the fabric running along the long edge.
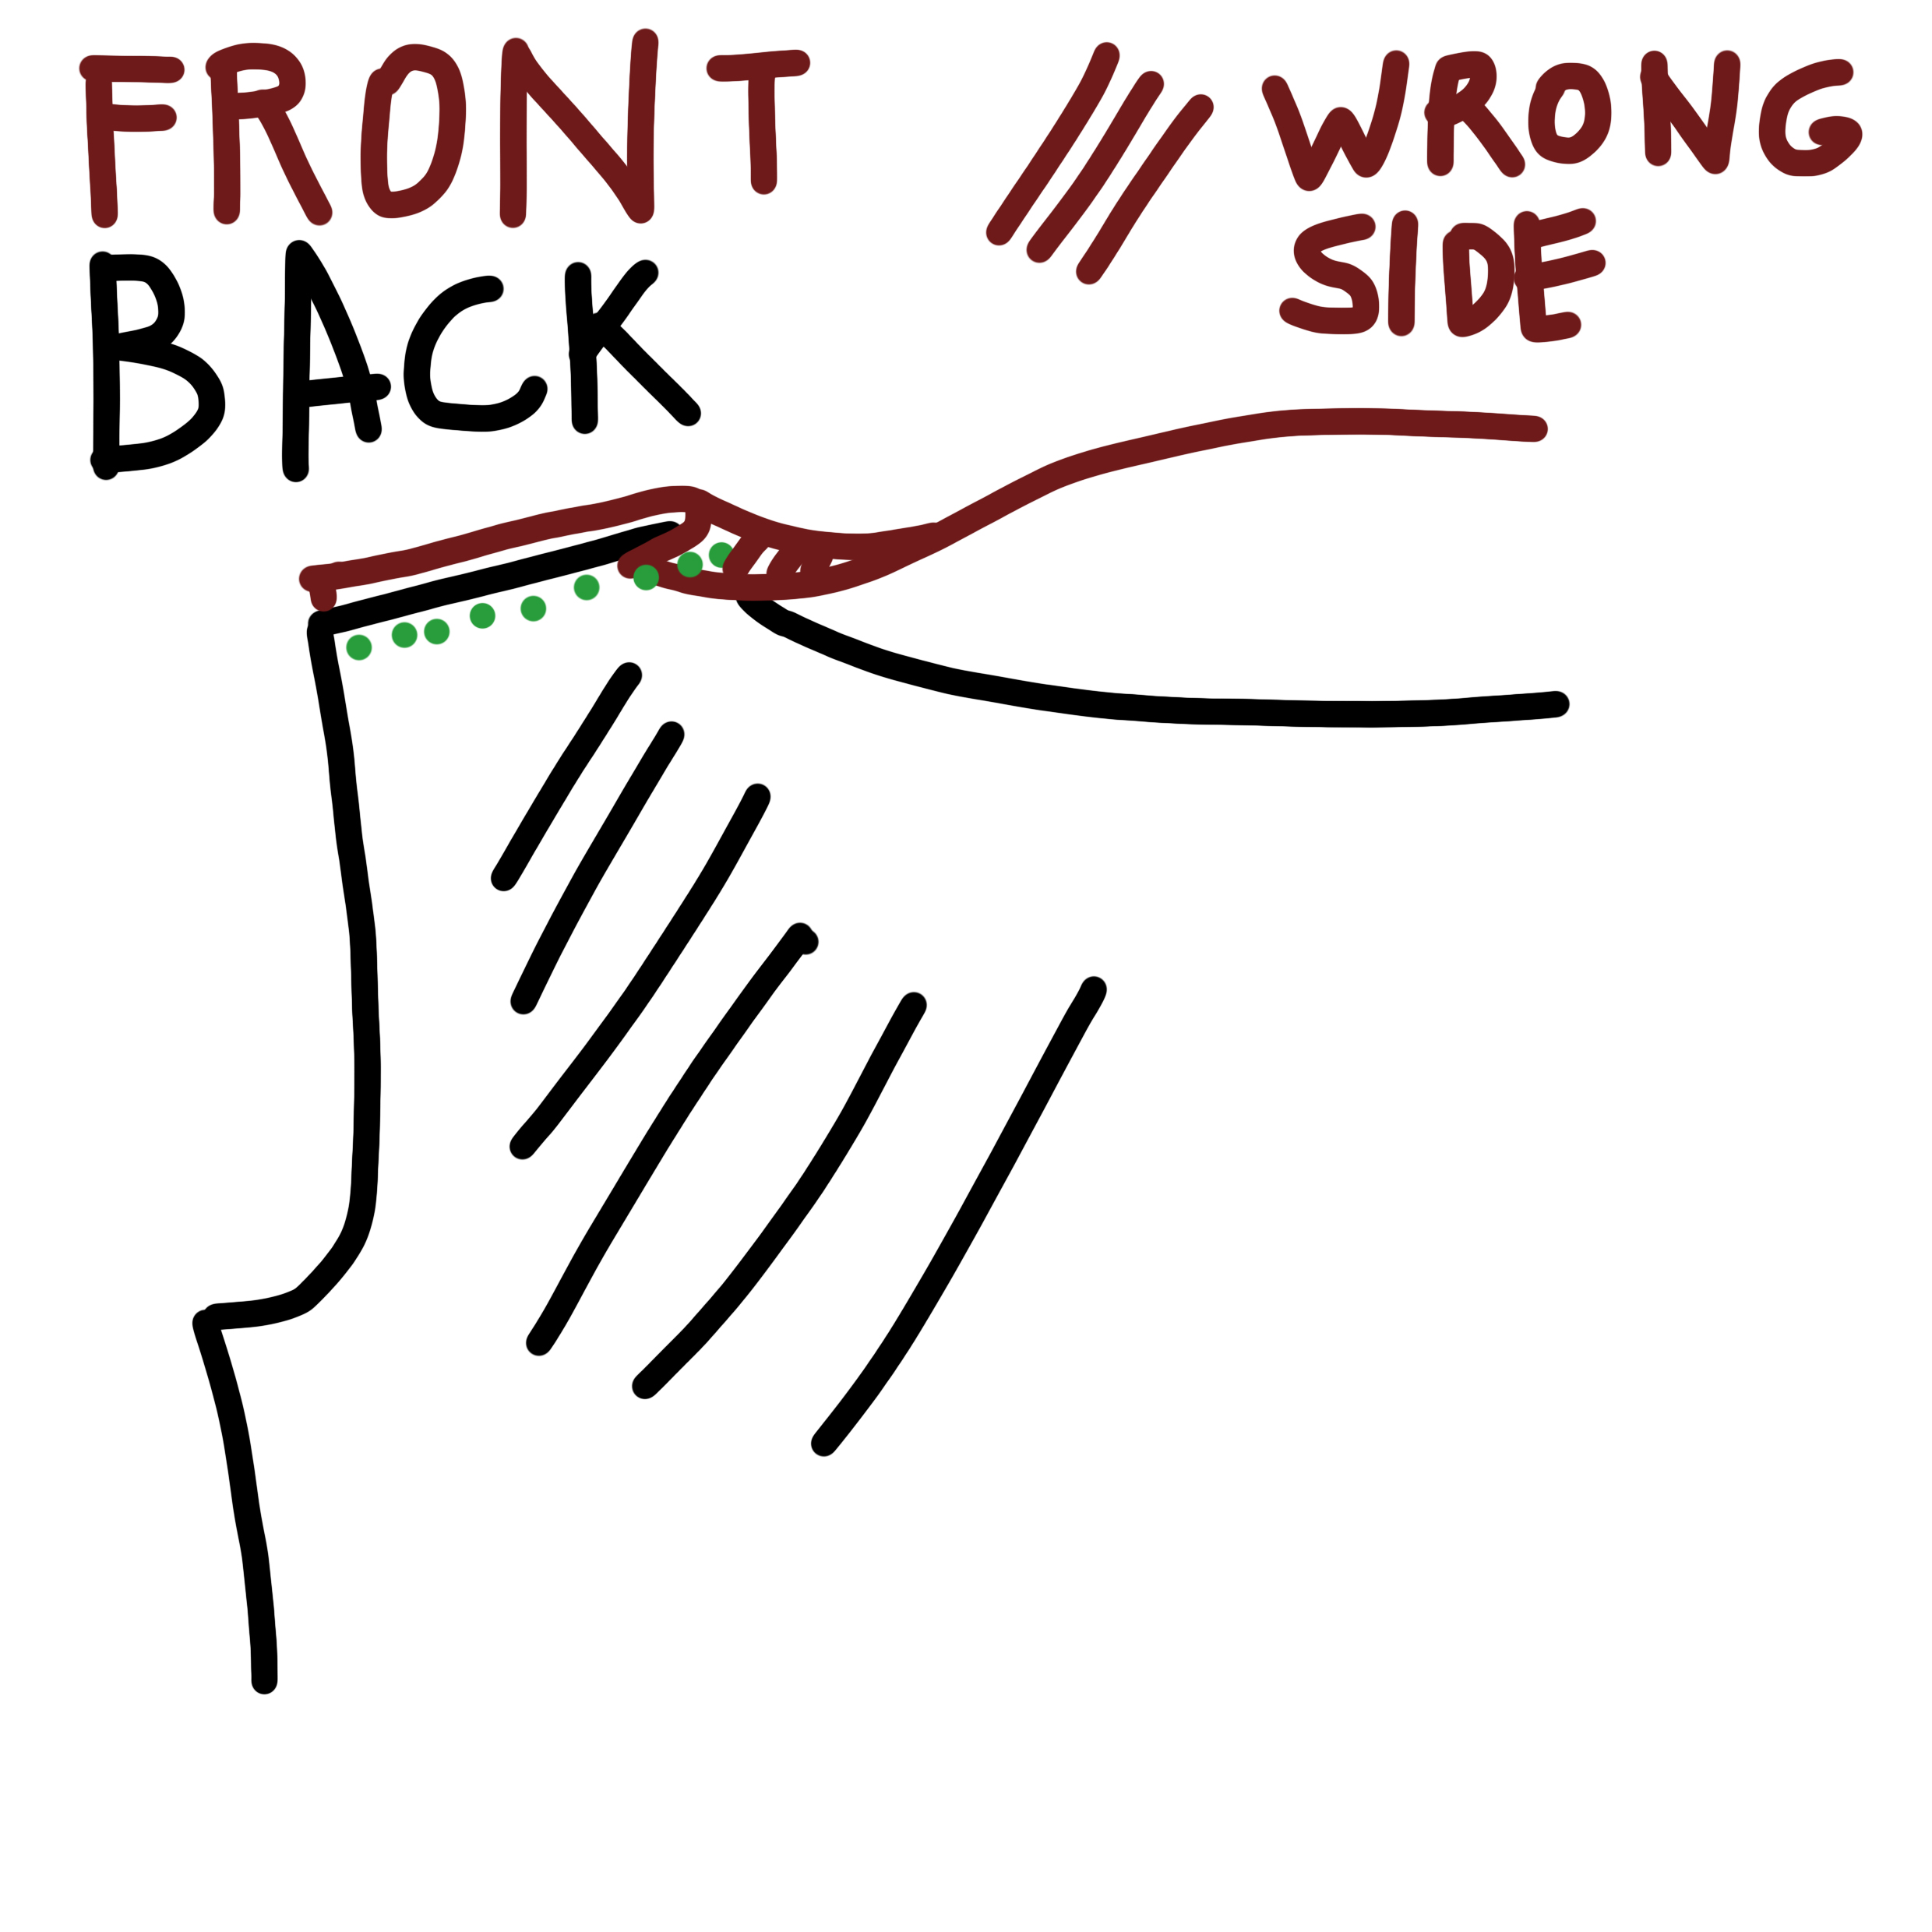
- With align the non-folded edge of the strip with the back neckline.
- Sew the strip to the back neckline and trim the seam.
- Turn the strip to the wrong side of the fabric and topstitch along the folded edge to keep it in place.
Step 2: Close shoulder seams
- Finish the raw edge on the front neckline in a way that suits your fabric (if it doesn’t fray, you can leave it unfinished).
- With , place the front on the back aligning the shoulder seams.
- Fold the front neckline seam allowance over to the wrong side of the back.
If you have a lightweight woven fabric you can fold this edge up again, so it will form a narrow double hem afterwards (it can help to press these folds first).
- Stitch the shoulder seam, enclosing the raw edge of the back neckline in the fold.
- Turn to the right side and press.
Step 3: Finish front neckline
Press the hem formed in your fabric by the folds you made at the shoulder seam when you closed the shoulder and topstitch close to the edge.
Step 4: Attach sleeves
The sleeve will be inserted flat, meaning the armhole seam will be sewn first and the sleeve and side seam will be closed in one go.
- With , matching notches, pin the sleeve head along the armhole.
- If necessary, ease in the sleeve head at the top, between the notches.
- Sew, finish and press the seam.
- Repeat for other sleeve.
Step 5: Close side and sleeve seam
- With pin the front to the back along the sleeve and side seams, making sure to line up the armhole seams.
- Sew, finish and press the seam.
Step 6: Hem
Finish the sleeves and bottom hems in a way that works with your fabric choice.
Again, this can mean folding the hem under twice and , finishing the raw edge with a serger or zig zag stitch and folding it under once or leaving the edge raw, folding it under once and trimming close to the stitching.
Step 7: Enjoy!
You’re all done! Now go enjoy your new top!